We use cookies to try and give you a better experience in Freshdesk.
You can learn more about what kind of cookies we use, why, and how from our Privacy policy. If you hate cookies, or are just on a diet, you can disable them altogether too. Just note that the Freshdesk service is pretty big on some cookies (we love the choco-chip ones), and some portions of Freshdesk may not work properly if you disable cookies.
We’ll also assume you agree to the way we use cookies and are ok with it as described in our Privacy policy, unless you choose to disable them altogether through your browser.
The Tools - A/R Utility in TPS Cloud Axis allows users to apply payments or adjustments to multiple invoices and unapplied payments in batch, making it easier to clear outstanding balances and apply adjustments across several client accounts. This is particularly useful for large batches of invoices or payments, especially when preparing for the integration with QuickBooks Online or clearing balances for inactive clients. However, because these actions can significantly affect a client's Accounts Receivable (A/R), access to this functionality is restricted and must be used with caution.
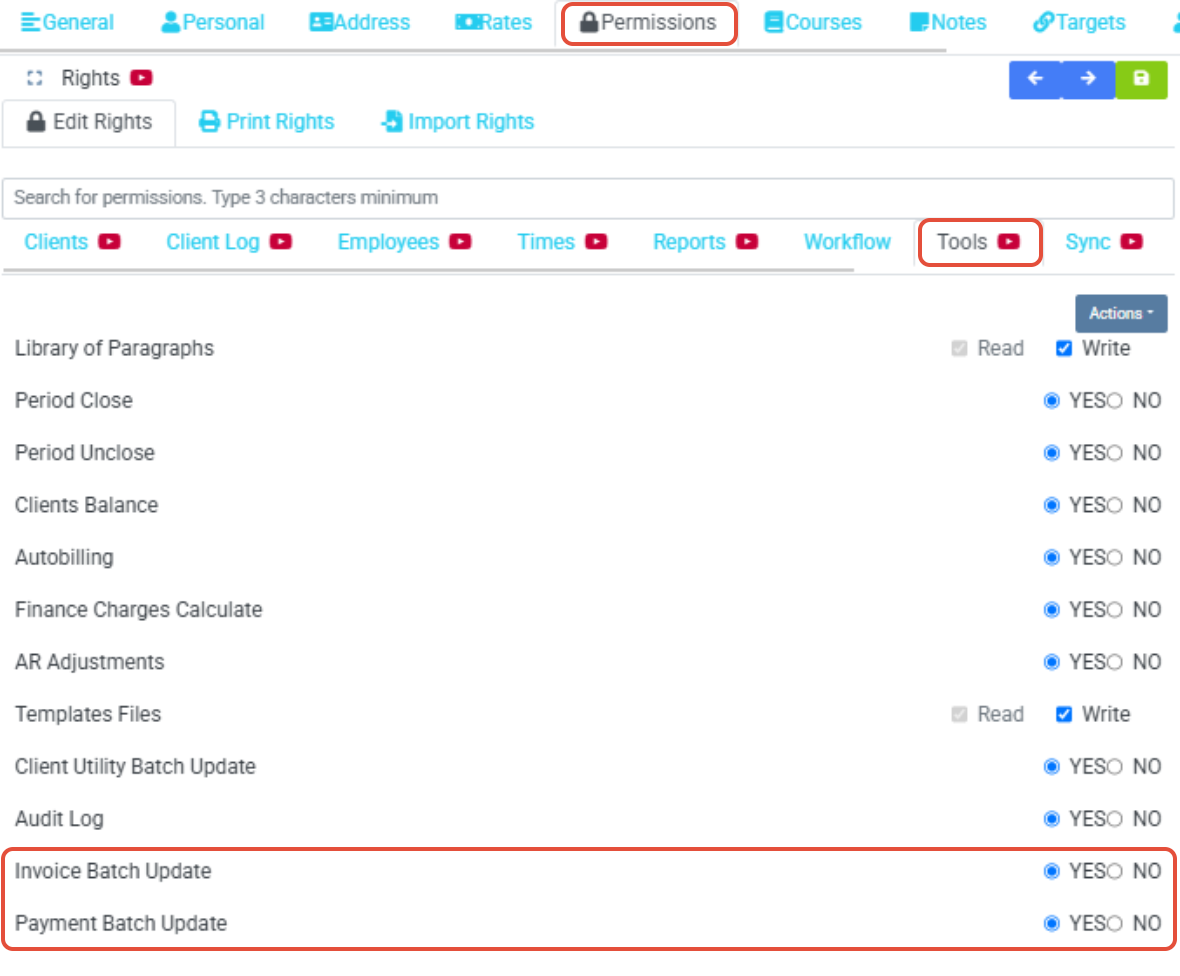
Before using the A/R Utility, ensure the required permissions are granted to employees. This can be done through the Employee Properties - Permissions Tab - Tools Subtab. Assign the following permissions:
Invoice Batch Update
Payment Batch Update
Navigate to Tools - A/R Utility:
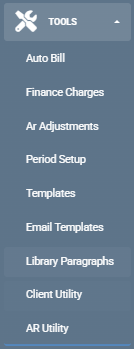
To begin using the A/R Utility, go to Tools - A/R Utility in the menu. Depending on your requirements, you will select either the Invoices Tab or Payments Tab.
Invoices Tab - Invoice Batch Update:
The Invoice Batch Update feature allows you to pay or adjust multiple invoices at once, applying the outstanding amount for each invoice in separate transactions.
Steps to Use Invoice Batch Update:
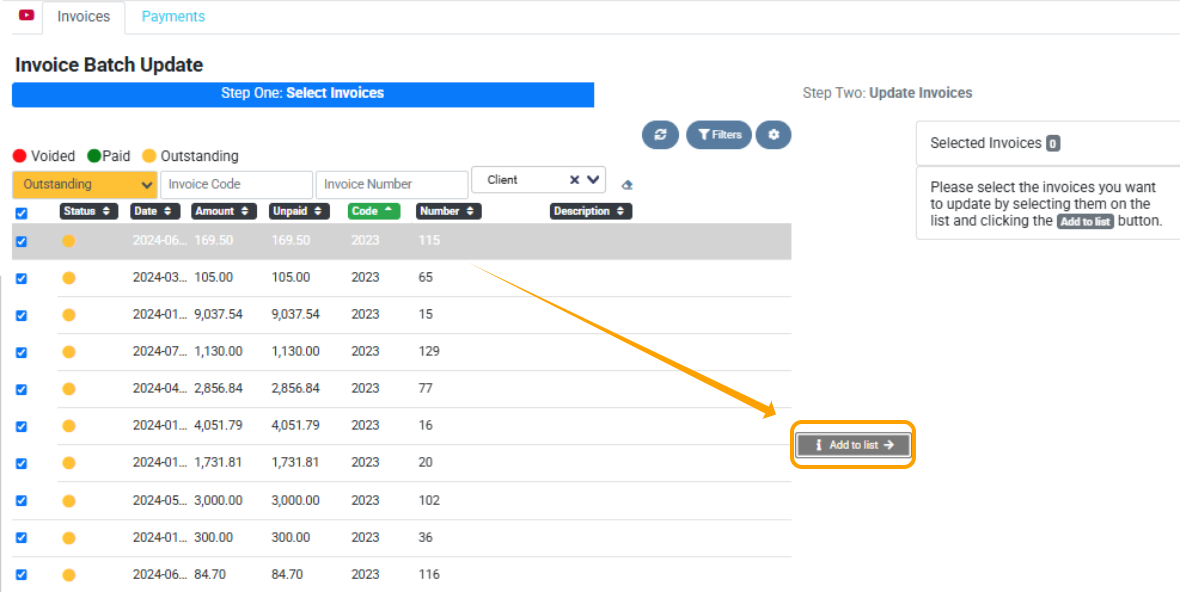
Select Invoices:
Filter by Invoice Status: Outstanding. You can also search by Invoice Code, Invoice Number, or Client if needed. Alternatively, use the filtering options available in the Filter icon to narrow the selection.

Add to List:
After selecting invoices using the checkbox next to each invoice you wish to include - click on Add to List.
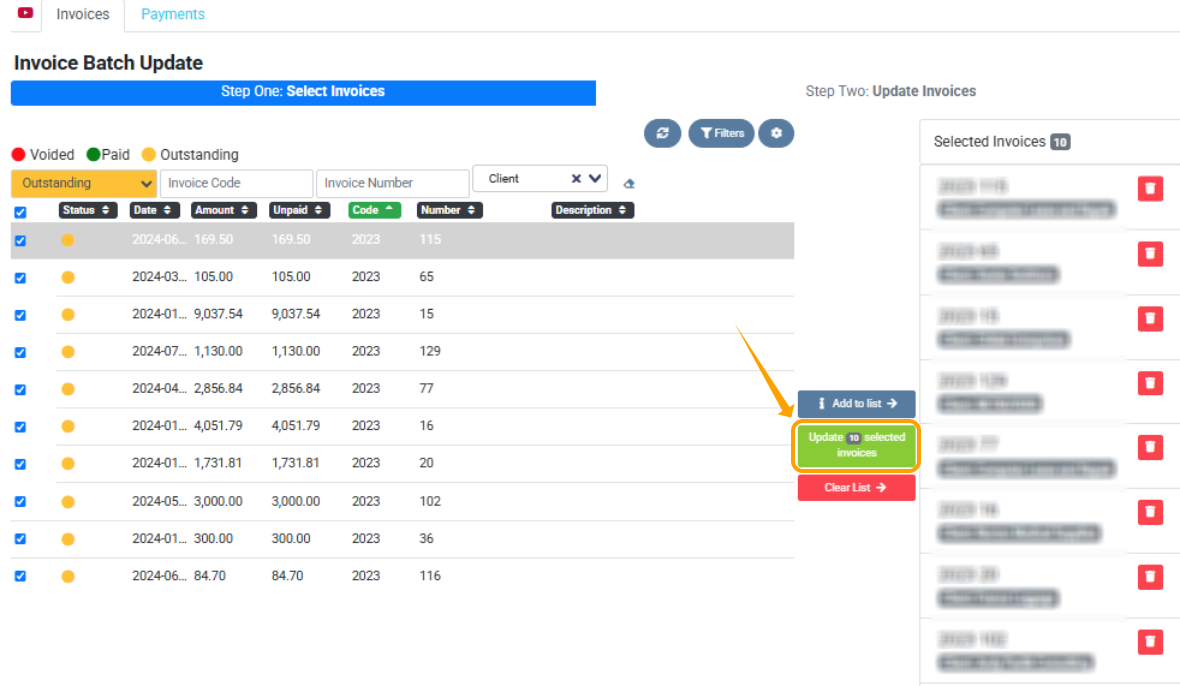
Update Selected Invoices:
Review the selected invoices. Once confirmed, click Update Selected Invoices to proceed.
Fill in Payment Information:
Date: Choose a Payment Date (or leave it empty to use the same date as the invoice).
Type: Select Payment or Adjustment.
B. Account: Choose the Bank Account - optional.
Method: Select the Payment Method - optional. .
Description: Enter a Description - optional.
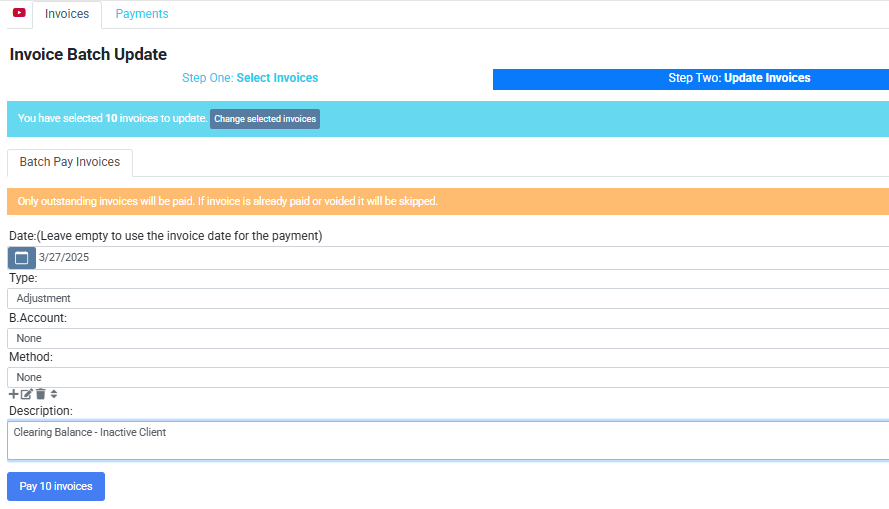
Pay Invoices:
Click Pay Invoices to finalize the batch process and apply payments or adjustments to the selected invoices.
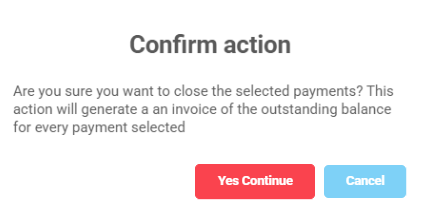
Confirm Action

Payments Tab - Payment Batch Update:
Steps to Use Payment Batch Update:
Select Payments:
Filter by Status: Outstanding and you can also search by Client if needed.

Add to List:
After selecting the unapplied payments using the checkbox next to each payment you wish to include - click on Add to List.
Update Selected Invoices:
Review the selected payments. Once confirmed, click Update Selected Payments to proceed.

Close Payments:
Click Close Payments to finalize the batch process, creating and applying an A/R Adjustment Increase (Invoice) to the selected unapplied payments and clearing the outstanding credit balance.

Confirm Action
Sincerely,

1-888-877-2231 - toll-free
0 Votes
0 Comments